Sent to you by Sparkie via Google Reader:
You might remember David van Alphen's name from his Friday Five back in January. I invited him for our Deconstruction column because he built a fantastic modern shed in his backyard for just about $3000 without using a kit. I've been watching his progress for quite some time and hoped that he'd be up for sharing the project with you. Check out the process photos and David's story, which might inspire you to build your own modern outdoor shed this Spring.
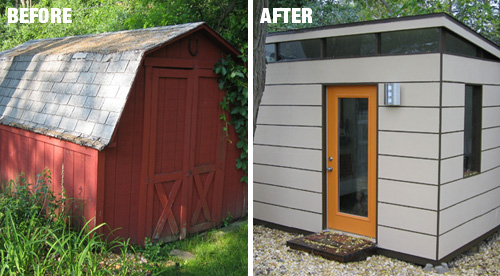

When we moved into our beautiful little ranch house, this is what was in the back yard. At first I thought it was a cute little shed but after further inspection, I saw that it was falling apart. Wood was rotting, walls were leaning and the floor was sinking.

Once I decided to replace the shed I decided that I would build a new studio in it's place. As I said earlier, our beautiful mid-century house is small. This was my current working condition with my studio in the boys playroom. I think that's all that needs to be said on that situation. I did some searching on the web and came across www.modern-shed.com. I loved the look of them but didn't have the extra $11,000 to buy a prefab. So I decided I would build it on my own trying to keep the cost under $2500.

The first thing I started with was to remove the barn doors the front of the shed. After doing this, I realized how unstable the structure was and decided to call the professionals!
So I called the great guys at 1-800-GOT-JUNK. They actually offered to tear down the structure for me for FREE. Who wouldn't want to do demo for free. If I wasn't scared of knocking down my new fence, I would have been happy to. After they tore it down, I went through the pieces of scrap and salvaged as much of the wood as I could. Unfortunately because of the condition, it wasn't much. Total cost for demo and haul-away — $275. Well worth it.
Since the old shed was on an angle, I had to move some dirt around to get the ground even again. I put cinder blocks in the ground underneath where the concrete corners to help keep the new studio from sinking. After everything was level, I built the floor using pressure treated wood to keep it from rotting. Then I laid the plywood down. Floors done!
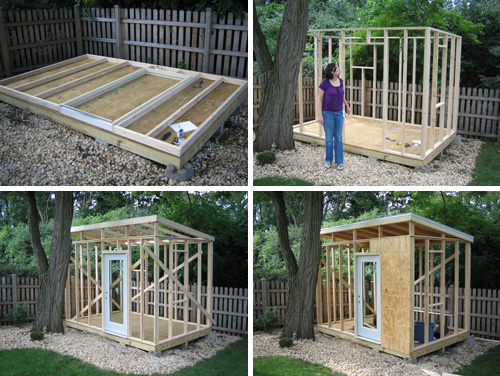
Then, the first wall went up. Within a couple hours, I had all four walls up. My wife Vicki give it the wind test by blowing on it. We do live in the windy City. Gotta be careful.
With the four walls up. Time to put the door in. I decided to spend a little extra on a nice glass exterior door to get the most light in. After the door was secure, up went the roof. This was definitely the most challenging part. I had to call the neighbor over to help me lift it onto the structure.
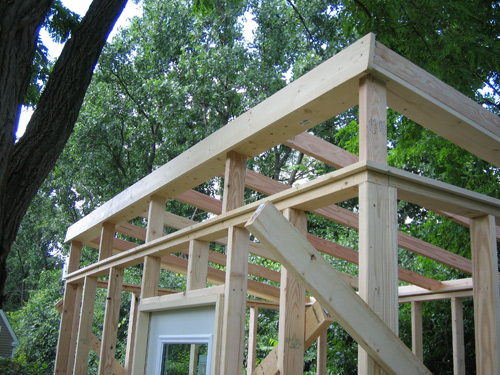
It was also tricky to figure out exactly where it would lay and make sure that all my dimension were right.
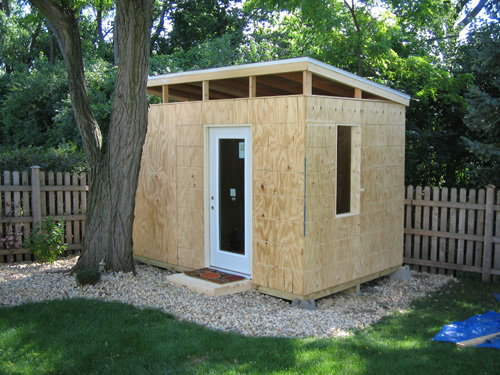
Once the frame was in place and everything was level, It was time to put the walls up. I used .75" plywood since I was routing grooves into them to give it the look of planks.
If you look closely, you can see the one that hasn't been routed yet on the end. It was actually easier too to route the boards when they were already up.

My wife wanted a front stoop to have her morning coffee. I guess I could have made it a little bigger for her.
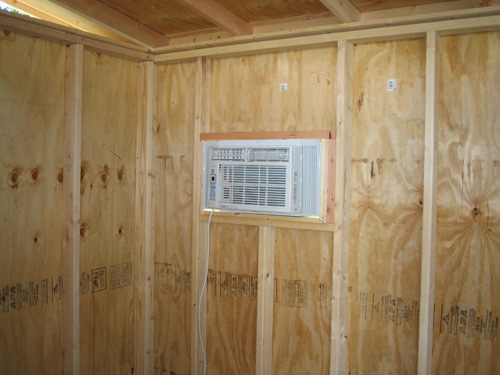
I built the AC unit right into the wall to save window space and make it less distracting.

Now for the electrical. This is always fun and exciting. Yeah, right. I actually had my dad out to help me with that so that I didn't wake up to a midnight bonfire in my back yard.
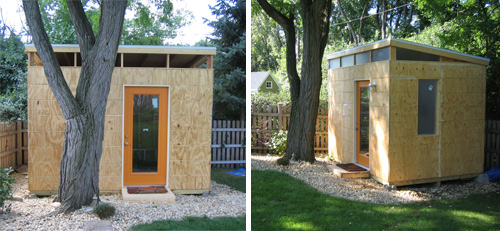
Took a little break from building and painted the front door. It is actually the same color as the front door of the house.
As I mentioned earlier, I have two little boys. So I thought it would be best to use Plexiglas. I also filled in all the cracks between the plywood.

Now that the outside is done, time to get to work inside. Up with the drywall.

One of my WTF was I thinking moments.

To save money, I decided to just stain the floor an espresso color. I also built a desk to run the length of the room and painted all the trim the same espresso color.
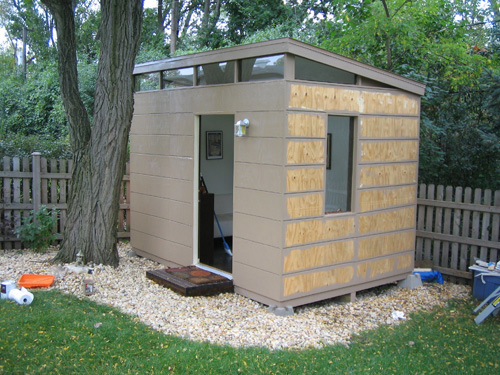
Now that the interior is done, it's time to paint the outside. I put two coats of a khaki primer on that my neighbor gave me.
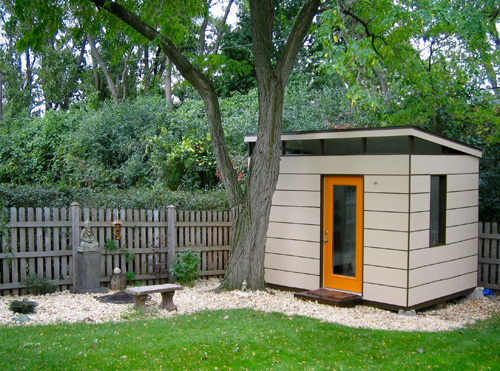
After the primer was dry, I painted the trim and routing grooves the same espresso color as the inside and painted the rest a cream color. I think the color scheme goes really well with the little Zen garden I made the Spring before.
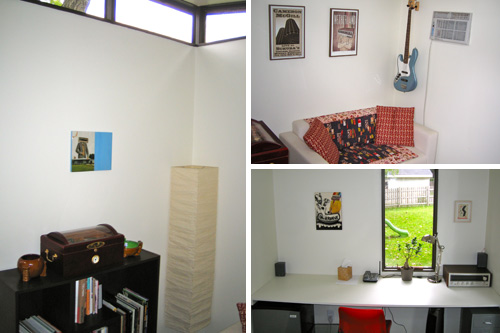
Interior view of the couch area, the desk with drawers and mini fridge. I still haven't moved all the art supplies out yet which is why it looks so clean.
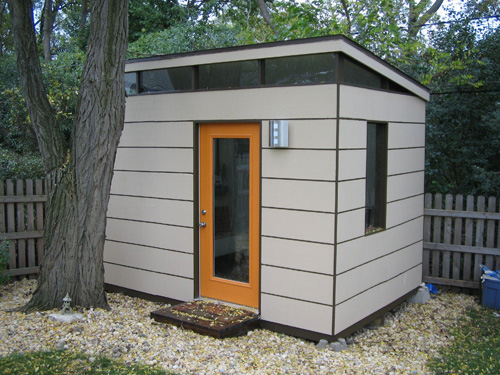
The last detail was the sconce on the outside. It actually took me about two months to find the right one that had a nice modern look and cost under $500! I got this for about $100. The final size of the studio is 8′ x 12′ and with all the extras I spent about $3000 total. Without the AC, fridge and other details, I could have easily come in under my $2500 goal.
©2010 Design Milk | Posted by Jaime in Architecture | Permalink | 7 comments | Tweet This | Share on Facebook
Things you can do from here:
- Subscribe to Design Milk using Google Reader
- Get started using Google Reader to easily keep up with all your favorite sites
No comments:
Post a Comment