Sent to you by Sparkie via Google Reader:
One complaint about Lightroom 2 is its lack of a feature enabling you to add copyright watermarks to your images as you Export them. There are workarounds that make use of the Identity Plate option in the slideshow and print modules but these are cumbersome at best. In Lightroom 3, at last, watermarking is built in to the Export module (and available in the Print, Slideshow and Web modules).

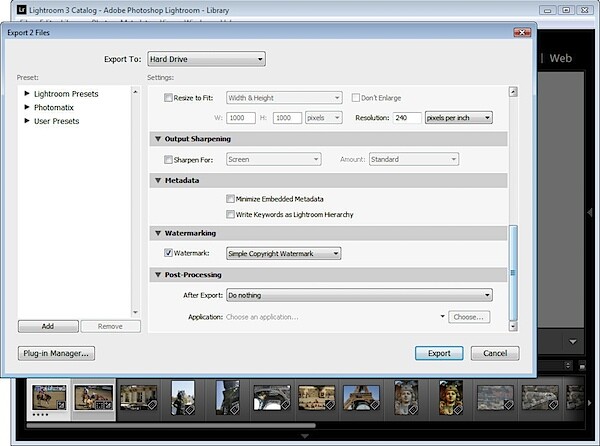
To see this new feature at work, make sure that you have downloaded Lightroom 3 Beta 2 from labs.adobe.com – this is the most recent beta. Select one or more images in the Library module, right click and choose Export > Export. In addition to choosing options such as the export location, file name and file type and sizing an image you will find the new watermarking option near the bottom of the dialog.
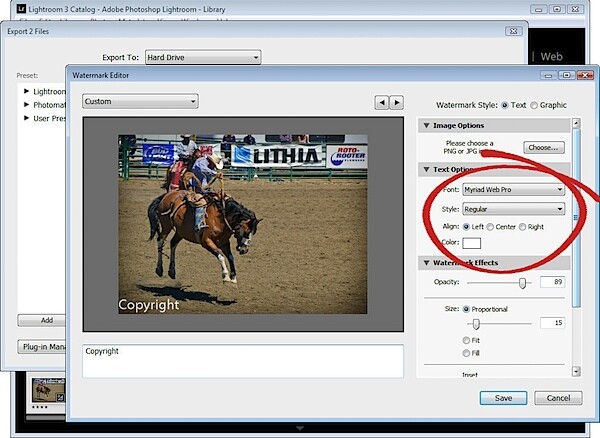
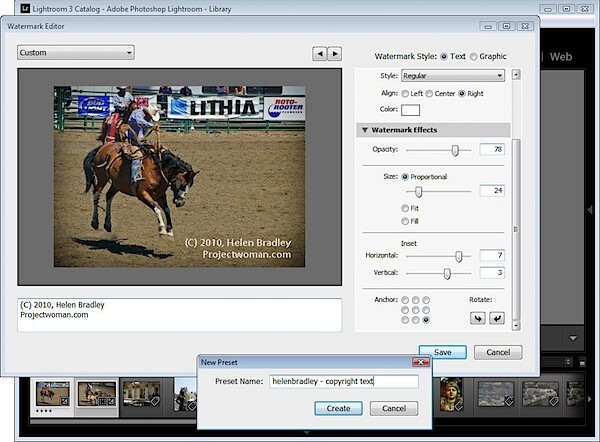
Enable the Watermark checkbox and from the dropdown list, select Edit Watermarks to display a watermark dialog. You can apply a text or a graphic watermark. For a text watermark, click the Text option button, then from the Text Options select your Font and Style.
Alignment controls the text alignment within the small box that it is placed inside so you will use this option if you have multiple lines of text. Color is the text color which you can select from a color picker – unfortunately there is no contrasting shadow added so you have to choose a text color that works on most images.
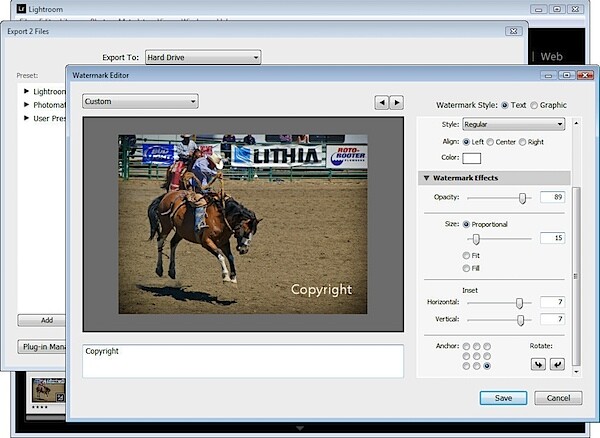
The Opacity setting adjusts the transparency of the copyright text and you can adjust this downwards to blend the copyright text in with the underlying image a little. Select Proportional size, Fit or Fill as desired. For my watermark I selected Proportional which is typically the option you will want to use.
The Anchor options allow you to place the copyright text within one of nine areas on the screen varying from top/left through center and to bottom/left.
Once you've selected the Anchor, adjust the Inset values to bring the text in from the vertical and horizontal margins so that it doesn't sit at the very edge of the image.
You can rotate the text by clicking one of the Rotate options.
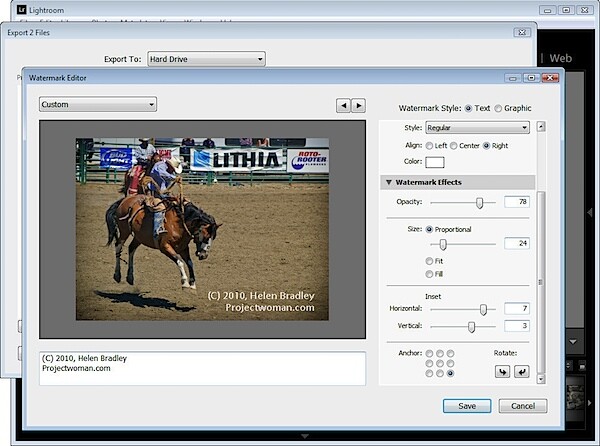
On the left of the dialog under your image is a text box with the word "copyright" in it. You can replace this with your own text – to create the copyright symbol type (C).
When you're done, click Save and type a name to save the copyright data as a preset so you can use it again in the Export or any other module that supports watermarking of images.
If you are editing an existing watermark, click the down-pointing arrow in the top left of the dialog where it will show (edited) after the preset name and choose Update Preset or Save Current Settings as a New Preset depending on what you want to do.
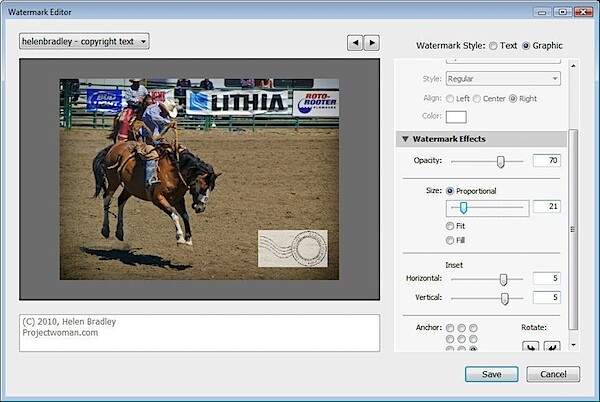
Instead of a text watermark, you can use an image you have created. To do this, enable the Image option at the top of the dialog and click to select the image to use.
A watermark saved as a JPG image will not be transparent so the watermark will appear as a solid rectangle on your image, as shown here.
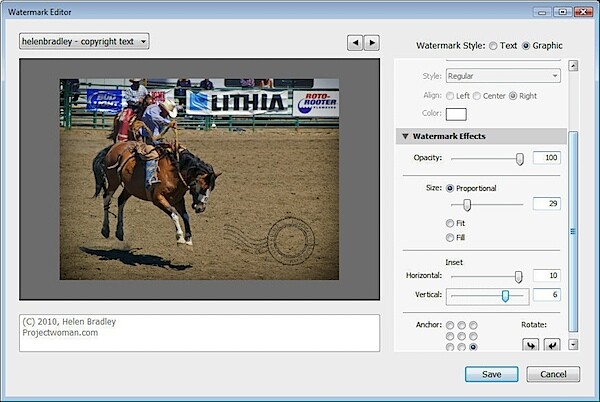
If you want to have a transparent background around your watermark, create the watermark as a PNG image with transparency in Photoshop or another editor, and import that as your watermark.
When you export your images, your watermark will be automatically added to them.
These same watermark options are also available, for example, in the Flickr Publish Services so you can automatically watermark images as you upload them to your Flickr account.
Post from: Digital Photography School - Photography Tips.
How to Copyright Watermark Your Images in Lightroom 3
Things you can do from here:
- Subscribe to Digital Photography School using Google Reader
- Get started using Google Reader to easily keep up with all your favorite sites

No comments:
Post a Comment